So thrilled to tell you Isobel Autumn is now safely home after 9 days in hospital with an infection.
She is absolutely gorgeous.
I am so proud and excited to have two grandaughters born within 8 days
Tuesday, 5 March 2013
Introducing Marcie Ann
So happy to introduce my second grandaughter Marcie Ann born on Friday March 1st
weighing 6lb 1oz.
She was born by caesarian and came out wide awake with her hand gripping tightly around the nurses finger.
A cousin for Isobel Autumn born 8 days before.
you can imagine how thrilled I am to have 2 little girls.
They will have plenty of craft supplies to play with
Sunday, 24 February 2013
paper mache box
This little gift box is another simple small item to make to sell at craft fairs.we will be listing the plain paper mache boxes in our shop soon. www.orchardcraftsupplies.co.uk
I base coated the entire box with vintage white acrylic paint. then using a sponge I edged the lid and box with pink acrylic paint. The angel was stamped on with a rubber stamp that I have had for ages. For the writing I used my Sakura pigment micro pen, then coloured the angel with promarkers.
They look great to pack a tiny gift. Also great for Christmas.
I'ts a girl
So happy to tell you my first grandaughter Isobel Autumn was born on Thursday 21st February.
She weighed 8lb 7oz.
Paula fought hard to have a natural birth but had to have a caesarian. they are both in hospital where Isobel is having blood tests for a bacteria infection, apparently this can happen if there is a long time between waters breaking and the birth. I will keep you informed on her progress.
She is so so lovely with a headfull of dark hair.
She weighed 8lb 7oz.
Paula fought hard to have a natural birth but had to have a caesarian. they are both in hospital where Isobel is having blood tests for a bacteria infection, apparently this can happen if there is a long time between waters breaking and the birth. I will keep you informed on her progress.
She is so so lovely with a headfull of dark hair.
Wednesday, 20 February 2013
First baby imminent
This is a picture of John and Paula on their wedding day 22nd October 2011
Looks likely that baby No 1 might arrive soon.
Had a text yesterday off John saying
'Paula's waters have broken, so she thought it was a good time to start the ironing.'
After doing the ironing she went to the hospital. They sent her home and she had to go back today
So Grandma Ros is getting all excited, still can't believe my little boy is about to become a Daddy.
My other sons were 9 and 12 when I had John so he will always be the baby of the family,
even though he is 31 this year
Will let you know what happens.
Monday, 18 February 2013
New stocks of peg people, reels etc..
We will be busy packing the new stocks that
have arrived and will list on our
website
( www.orchardcraftsupplies.co.uk )
and ebay store as soon as possible.
Lots of peg people, spools, clothespin and kokeshi dolls
Sunday, 17 February 2013
Babysitting voucher.
I have been playing again.
Have made babysitting vouchers for my sons and wives for when the babies arrive.
Just a bit of fun really!!
I printed the message on white card , Then using my sizzix machine and a large tag die that I have had for a long time I cut a tag shape from a piece of patterned card .(Ruth Watkins. Baby 4 from Craft Creations.).
I put the tag aside to use another time.
Then i put double sided tape on the back of the card around the aperture. this was then placed over the message, The larger tag was then cut freehand with scissors. The smaller message was added with double sided tape. A hole was punched at the top and ribbon threaded through.
I added a sizzix baby die cut that I had., the rabbit was cut from the patterned card.
I am sure they will take me up on the babysitting offer.
Saturday, 16 February 2013
Graduate Peg Doll
I made these graduate dolls for a friends daughter.
They are made using a 7cm wooden cone doll (WCD.05)
Paint a face on the head part, then paint from neck down with black paint. I glued some ribbon on to form collar.
The hair is mini curl doll hair, wool shredded and glued on would be fine. the mortar board was made from a 20mm miniature wooden bowl painted black, turned upside down to fit on head with glue.Then a 25mm square of felt was glued to bowl and a few strands of embroidery thread to form a tassle.
Another quick and easy item to sell at craft fairs
Friday, 15 February 2013
Whoopee..I'm going to be a grandma....
I am so excited, I am soon to become a grandma, granny, nana,
I don't care what they call me i will answer to all names.
I have waited years for this to happen and now, like what they say about buses, 2 come along together.
My youngest son John and his wife Paula are expecting their first child about the 20th of February. and my middle son Ian and his wife Maria are expecting theirs about the 28th February..I will keep you updated
Here are couple of countdown signs I made
They are just made from plywood rectangles, basecoated and then edged in colour, strung with ribbon.
Hearts painted with blackboard paint have been glued on, the writing was done with a Sakura micro pigment pen, then a few rub ons added. The countdown is added with chalk. Another simple idea for craft fair sales.
I have 3 sons, have you noticed one baby is going to be a girl, Whoooeee. Could be 2 girls. they will be so loved .
Thursday, 14 February 2013
Thimbellina, our smallest angel.
People are always asking for ideas for small items, quick to make that they can sell at craft fairs.
Thimbellina is ideal. We used to make them many years ago when we exhibited at sewing fairs.
A wooden thimble for the body, 20mm wooden bead for the head,Wool or doll hair, a button for her halo, and a bow for her wings
Paint the wooden thimble with acrylic paints, we personalised them using a marker pen.
Paint or draw a face on the bead. glue the bead to the top of thimble..
Glue on shredded wool yarn for hair.glue on a button for halo and glue a bow to back of thimble to represent wings.A simple to make cute gift to give to your sewing friends.
Ideal little gift for mothers day.
Tuesday, 12 February 2013
Cotton Reel Creations /spoolie dolls
To make a 13cm doll you will need
1 x 25mm wood Bead for the head
7 x 20mm Wood spools/reels
4 x 12mm Wood beads
100cm jute twine.
wool or dolls hair.
acrylic paint or marker pens for face,
Fabric for dress and bow.
Paint a simple face on 25mm wood bead for head.
Fold jute twine in half and insert folded end through the hole of head bead. Tie an overhand knot approx. 8cm from fold to form a hanging loop. Push head close to the knot and tie another knot at base of head. (fig.1)
To form arms, separate the two strands of twine. Take one strand and fold at 8cm. thread loop through one reel and one bead. push reel and bead up close to head (fig.2).Tie a knot at end of small bead for hand Repeat on other side for second arm.
Hold the two pieces of loose twine together and thread through one reel to form body.
Separate the strands. Take one strand and thread through two reels and one bead to form leg. Repeat with second strand for other leg. Push reels and bead close to body reel and tie a double knot at base of bead. make sure the knot is big enough to stop the bead slipping off. A small dot of glue can be added to make sure it is secure. When it is secure cut off excess twine. (fig 3).
Glue shredded wool or doll hair to head using hot glue gun or any glue that dries clear.
To dress your doll you will need a piece of fabric approx 25cm x 8cm.
Sew short ends of fabric together for back seam.
Fray one long edge for bottom of dress.
Cut slits 2.5cm deep, 6cm from seam either side at top of dress to form armholes.
Run gathering stitches along top edge of material. put dress on doll with arms through slit. Pull stitches tightly around neck and secure thread at back
Your doll is now ready to decorate as you wish.
Different size dolls can be made using different sizes of spools and beads.
The dolls are for decoration only, Because of all the small parts they are unsuitable as toys.
We will be listing kits for these in our store, complete with painted face.
1 x 25mm wood Bead for the head
7 x 20mm Wood spools/reels
4 x 12mm Wood beads
100cm jute twine.
wool or dolls hair.
acrylic paint or marker pens for face,
Fabric for dress and bow.
Paint a simple face on 25mm wood bead for head.
Fold jute twine in half and insert folded end through the hole of head bead. Tie an overhand knot approx. 8cm from fold to form a hanging loop. Push head close to the knot and tie another knot at base of head. (fig.1)
To form arms, separate the two strands of twine. Take one strand and fold at 8cm. thread loop through one reel and one bead. push reel and bead up close to head (fig.2).Tie a knot at end of small bead for hand Repeat on other side for second arm.
Hold the two pieces of loose twine together and thread through one reel to form body.
Separate the strands. Take one strand and thread through two reels and one bead to form leg. Repeat with second strand for other leg. Push reels and bead close to body reel and tie a double knot at base of bead. make sure the knot is big enough to stop the bead slipping off. A small dot of glue can be added to make sure it is secure. When it is secure cut off excess twine. (fig 3).
Glue shredded wool or doll hair to head using hot glue gun or any glue that dries clear.
To dress your doll you will need a piece of fabric approx 25cm x 8cm.
Sew short ends of fabric together for back seam.
Fray one long edge for bottom of dress.
Cut slits 2.5cm deep, 6cm from seam either side at top of dress to form armholes.
Run gathering stitches along top edge of material. put dress on doll with arms through slit. Pull stitches tightly around neck and secure thread at back
Your doll is now ready to decorate as you wish.
Different size dolls can be made using different sizes of spools and beads.
The dolls are for decoration only, Because of all the small parts they are unsuitable as toys.
We will be listing kits for these in our store, complete with painted face.
Monday, 11 February 2013
Spoolie Dolls.
Sorry For not blogging for a long time, We are now back and will be listing projects weekly.
Many people have asked about the spoolie dolls, we call them Cotton Reel Creations. Small wooden dolls made from wood spools and beads threaded together with jute twine.
I will download photos and instructions how to make them tomorrow, Having trouble downloading at the moment.
Many people have asked about the spoolie dolls, we call them Cotton Reel Creations. Small wooden dolls made from wood spools and beads threaded together with jute twine.
I will download photos and instructions how to make them tomorrow, Having trouble downloading at the moment.
Tuesday, 30 October 2012
Flutterby Art Boutique
A lovely new store has opened at Curborough Craft Centre
I am having difficulty loading the photos so will put a link to sites.
http://www.facebook.com/theflutterbyartboutique
http://www.flutterbyartboutique.com/
Showcasing the works of about 30 different crafters, plus daily classes.
Well worth a visit,
I am having difficulty loading the photos so will put a link to sites.
http://www.facebook.com/theflutterbyartboutique
http://www.flutterbyartboutique.com/
Showcasing the works of about 30 different crafters, plus daily classes.
Well worth a visit,
Friday, 19 October 2012
It's All Fiddle Fart: Jewelled Mirror
WOW!!! That's a real masterpiece.
Must go and sort my objet d'art (creative clutter)
Will let you know if I ever get round to making one.

Take a look at Helens blog, it is a real inspiration.
WOW!!! That's a real masterpiece.
Must go and sort my objet d'art (creative clutter)
Will let you know if I ever get round to making one.
Take a look at Helens blog, it is a real inspiration.
Friday, 20 July 2012
Have a Heart.
I have had a couple of days off this week, it was my birthday so I thought I would have a rest and re-charge my batteries.
Back working today, base coating wooden hearts of different sizes.
I always use cheap kitchen sponges to paint with. You can get a pack of 20 at £1 shops.cut each sponge in to 6 or 8 pieces then you can throw them away after use. I have watched people at classes wash them, They absorb that much paint it takes so long to get them clean and makes so much mess in the sink that I find it better to put them in the bin.
Using acrylic paint wipe a coat of paint on to heart, when dry dip a piece of sponge into colour paint of your choice, rub most of the paint off .
Dab the sponge around the edge of heart.
I always use a Sakura.Micron Pigma pen to write a name or message. Dotting each letter with acrylic paint..
You can also use rubber stamps, the get well soon hearts in the picture were printed using a rubber stamp.
I add the faux stitches , running stitch or blanket stitch with the pen.
Here are some ideas to use the hearts
Back working today, base coating wooden hearts of different sizes.
I always use cheap kitchen sponges to paint with. You can get a pack of 20 at £1 shops.cut each sponge in to 6 or 8 pieces then you can throw them away after use. I have watched people at classes wash them, They absorb that much paint it takes so long to get them clean and makes so much mess in the sink that I find it better to put them in the bin.
Using acrylic paint wipe a coat of paint on to heart, when dry dip a piece of sponge into colour paint of your choice, rub most of the paint off .
Dab the sponge around the edge of heart.
I always use a Sakura.Micron Pigma pen to write a name or message. Dotting each letter with acrylic paint..
You can also use rubber stamps, the get well soon hearts in the picture were printed using a rubber stamp.
I add the faux stitches , running stitch or blanket stitch with the pen.
Here are some ideas to use the hearts
| Wedding favours |
Welly pegs
Wall hanger with stamped image.
Hanging heart with dotted flowers..
I love doing the dip dot flowers.
Sunday, 15 July 2012
Dog sitting
I have been quietly playing crafts on the dining room table today whilst I have been dog sitting
I did manage to make another small sewing doll decoration.
The workshops are sewing themes at the moment so I am trying out ideas recycled from my past projects.
I have been making the larger button dolls for the past 11 years but the suppliers of the wooden body cones have stopped making that size, we have lots of other sizes on our website.
The makers of the mini curl hair have now closed down, we have a small amount left.
I have tried other makes of doll hair but they are not as good.Will keep looking.
The small doll was made with a 5cm cone, was a bit fiddly so will not be making any more.
Have sat her on wooden block offcuts, painted and decorated with sewing theme buttons and embellishments
I have been making the larger button dolls for the past 11 years but the suppliers of the wooden body cones have stopped making that size, we have lots of other sizes on our website.
The makers of the mini curl hair have now closed down, we have a small amount left.
I have tried other makes of doll hair but they are not as good.Will keep looking.
The small doll was made with a 5cm cone, was a bit fiddly so will not be making any more.
Have sat her on wooden block offcuts, painted and decorated with sewing theme buttons and embellishments
The little doll looks as though she has chickens feet and I did not realise until I had taken the photo that I had forgotten to add the faux stitches to the rest of the blocks.
Oh well a work in progress!!
Here is a picture of Freddie and Honey.
A quiet moment.
Charging round the garden.
Honey the basset hound comes to stay when my son and his wife go out.
Luckily the dogs get along great
Saturday, 14 July 2012
Sewing Room
I made these as samples for our sewing room theme workshops to be held at
Curborough Craft Centre
Sewing Room Wreath
The wreath is a 20cm wicker wreath which we will be listing on our website soon.
The dress form is cut from thick card using a Tim Holtz die. I put a piece of wood dowelling on the back to strengthen it. After edging the dress form with Tim holtz vintage photo distress ink I glued it to the wreath.
A simple fabric yoyo was added with a button in the centre. Yoyo's are circles of fabric with running stitches sewn around the edge and gathered up tightly. the button hides any rough edges. For a neater edge you can turn fabric edge in before sewing .
I then glued sewing themed buttons and embellishments on to the wreath.
a few inches of tape measure ribbon which I had tea dyed made a good hanger.
Sewing Room Door Hanger
I made the door hanger in the same theme as the wreath.
Using a plywood door hanger available from our store,I base coated it in antique white acrylic paint.
I then edged it with Distress ink. After edging the card dress form I glued it to the door hanger with tacky glue.A small fabric yoyo was added.Some tiny tiny buttons that I had were glued around the neck ,
The images were stamped on randomly using stamps that I had as a free gift with a copy of Crafts Beautiful magazine Not being the best stamper. I made a couple of smudges so I added a few sewing theme buttons to cover them up Using my favourite Sakura Micron Pigma Pen I wrote sewing room and finished the writing with dots on each letter. Then the hanger was finished off with faux stitches round the edges.
More packing to do, good thing I love buttons
Buttons, buttons, more buttons
Thought i would make a couple of things with the loose buttons. First I made a sign warning about the buttons in the room. I had a delivery of thousands of buttons which had not been packed too well by supplier, there seems to be buttons everywhere, hence the sign
Started packing a few of the buttons for sale at the craft centre.
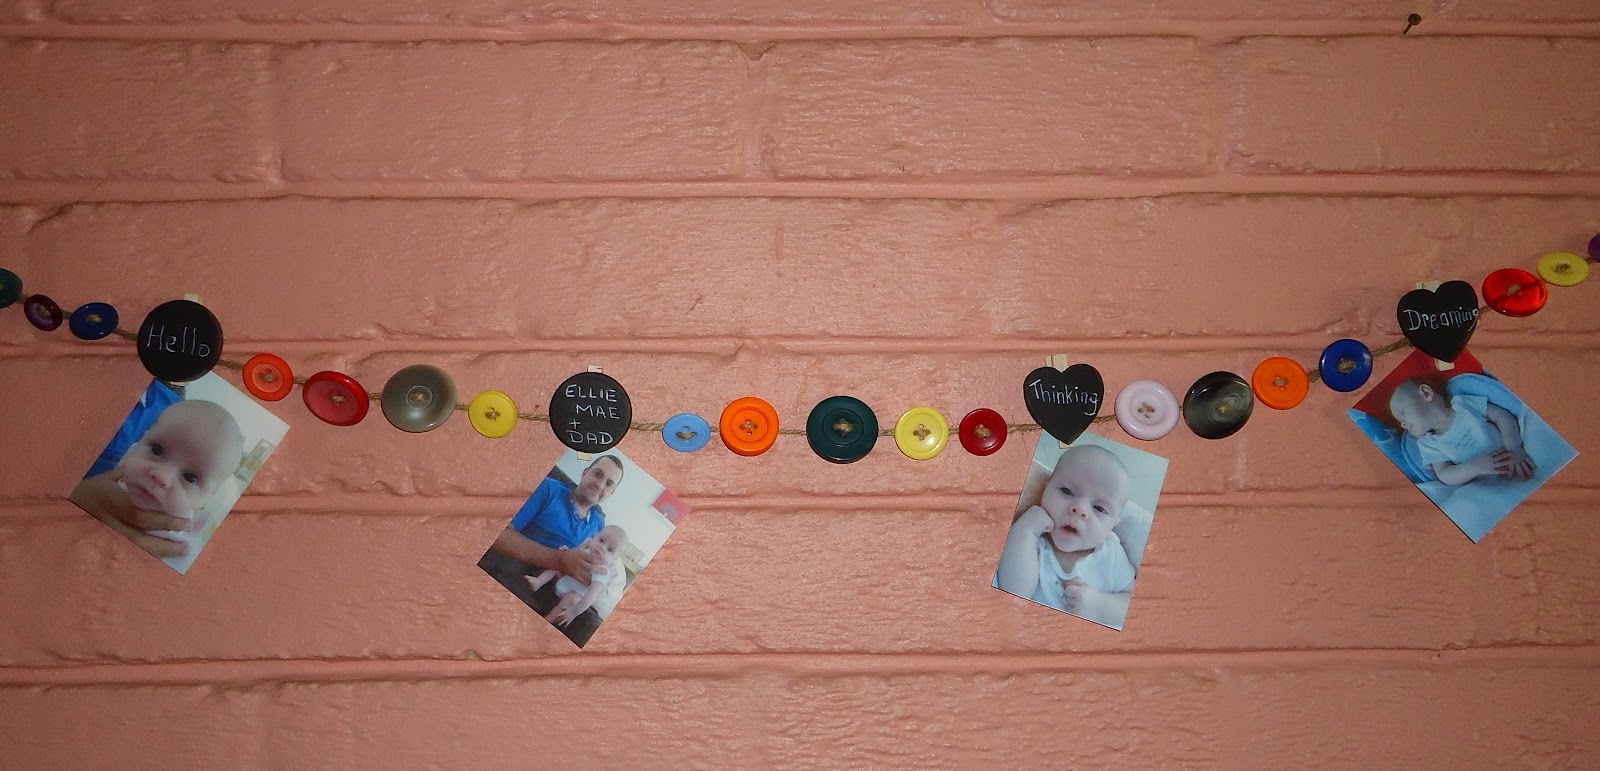
Then I decided to make a button garland
I threaded buttons on to jute twine to make a button garland, made loops at each end to hang it up, then I pinned photos on using the chalkboard pegs that I had made. Think I will use ribbon in place of the jute next time.
Next I made a button Pin board.
Using a cork pin board that i bought from a pound store, I painted the edges with acrylic paint, then
glued buttons on randomly with HiTack glue.
The message along the top was put on freehand with a Sakura Micron Pigma pen bought off Ebay. I dotted the ends of each letter with acrylic paint using a wooden barbecue skewer.
Using the HiTack glue again I glued a button on the end of the pins that were
supplied with the board.
Glue and buttons for sale in our store.
I did look at this and thought that I could have added shells in the place of the buttons to make a seaside theme, perhaps another day.
Boards that we have decorated are on sale at Curborough Craft Centre
Started packing a few of the buttons for sale at the craft centre.
Then I decided to make a button garland
I threaded buttons on to jute twine to make a button garland, made loops at each end to hang it up, then I pinned photos on using the chalkboard pegs that I had made. Think I will use ribbon in place of the jute next time.
Next I made a button Pin board.
Using a cork pin board that i bought from a pound store, I painted the edges with acrylic paint, then
glued buttons on randomly with HiTack glue.
The message along the top was put on freehand with a Sakura Micron Pigma pen bought off Ebay. I dotted the ends of each letter with acrylic paint using a wooden barbecue skewer.
Using the HiTack glue again I glued a button on the end of the pins that were
supplied with the board.
Glue and buttons for sale in our store.
I did look at this and thought that I could have added shells in the place of the buttons to make a seaside theme, perhaps another day.
Boards that we have decorated are on sale at Curborough Craft Centre
Heart Chalkboards
With all the rain we are having it has given me time to stay inside and play in the workshop.
Have kept myself busy making more stocks of small chalkboard pegs. I use the 38mm wooden hearts and circles. spray them with chalkboard paint, I used to spend ages hand painting them, but have found the spray paint works out very reasonable when you are making a lot.
When paint is dry glue a 45mm peg on the back . I like to use HiTack glue
They make great clips,tags, hangers etc...
I also like to make larger heart signs, After painting drill holes and thread ribbon, wire or jute through and hang on wall, doors, cupboard knobs etc...
You can also make into fridge magnets by gluing a magnet on the back of heart.
I like to paint washing size pegs with polka dots and add a heart. Tie ribbon on to peg and tie chalk on other end.
These are all good sellers at craft fairs and school / church sales. they make lovely gifts for family and friends.
The finished chalkboards will be for sale at
The Arches Gift Shop.Curborough Craft Centre, Lichfield. Staffordshire WS13 8ES
Friday, 13 July 2012
Door Hangers for Baby
I started to clear out old stock. i had a few plain wood door hangers which we do not stock anymore. Base coated them with antique white acrylic paint, edged them with acrylic paint in colours to match the embellishments that I had. These are card die- cuts which I bought from Ebay. I love these die cuts and the seller finishes them off so nicely.Glued the embellishments on the door hangers with tacky glue. I added the message with Sakura Micron Pigma Pen then dotted the letters with acrylic paint.
When they were dry I gave a light spray with Americana sealer. Tied ribbons on to pretty them up.
will be selling these at The Arches Gift Shop.
Curborough Craft Centre
Lichfield. WS13 8ES
Staffordshire.
When they were dry I gave a light spray with Americana sealer. Tied ribbons on to pretty them up.
will be selling these at The Arches Gift Shop.
Curborough Craft Centre
Lichfield. WS13 8ES
Staffordshire.
Subscribe to:
Posts (Atom)